| 08-23-2012, 02:25 PM | #90 | |

1806
Rep 7,664
Posts |
Quote:
With that being said most of those guys do not have matte black wheels so in that case I recommend going with a Alpine White surround, matte black insert, and the light tinted LED. PM if you have any further questions.
__________________
|
|
|
Appreciate
0
|
| 08-23-2012, 06:57 PM | #92 |

1806
Rep 7,664
Posts |
Short of taking the F10 to a local paint shop and having them mask the car the only other solution we can think of is vinyl. It is not the most cutting edge solution, but it is nonetheless a solution. Upon taking delivery of our beast we will look into making a template for M5post members.
__________________
|
|
Appreciate
0
|
| 08-23-2012, 07:01 PM | #93 |
|
Internet Crash Test Dummy

346
Rep 1,055
Posts
Drives: F97 X3MC / F80 M3 / F90 M5
Join Date: Mar 2006
Location: Under a rock in NH and BOS
|
As Andrew said it's not too easy to just paint the inserts. Vinyl seems to be most feasible.
New handles are 300$ a piece. Could paint them but might be tricky to color match them
__________________
21 F97 X3MC Toronto Red/Black and more | 18 F80 M3 Tanzanite Blue/Amaro/CCB and more
15 F10 M5 Individual / Brilliant White / Extended/Full Cohiba Brown (Exec/Driver/B&O/20") / A few Euro add-ons / Stealth K40 / Upgraded B&O / ///M Performance Carbon Interior Trim / IND / Akrapovic Evolution Exhaust / HRE S107  |
|
Appreciate
0
|
| 08-25-2012, 10:09 AM | #95 | ||
|
Major
 104
Rep 1,312
Posts |
Quote:
I will be placing my order when I get back from Germany in two weeks! Great work |
||
|
Appreciate
0
|
| 08-26-2012, 04:56 AM | #96 | |
|
New Member
0
Rep 13
Posts |
Quote:
 Wow IND - great work! My Silverstone with Black leather is set for Welt delivery 22 Sept 2012 and I would love to have the grills (fronts/sides) and side reflectors done ASAP. Wow IND - great work! My Silverstone with Black leather is set for Welt delivery 22 Sept 2012 and I would love to have the grills (fronts/sides) and side reflectors done ASAP.Do you have a photoshop pics with all done in Silverstone??? While I am not 100% convinced that I would go that route - would like to see the possiblity of it. Otherwise - do you have any pics with the reflectors installed in Silverstone and the front and side grilles done in gloss black? I am a new member on F10 M5 post - Please let me know cost and how quickly I can get them?  M52013UDM |
|
|
Appreciate
0
|
| 08-26-2012, 04:58 AM | #97 |
|
Private
 2
Rep 95
Posts |
[QUOTE=Nate@IND;12556207]A little unique let me know what you guys think
 Gloss black surrounds + MCB on the mesh + light LED's Nate, what do you think if we paint my side grilles gloss black surrounds and "custom paint" on the mesh? BTW, any updates for me?  |
|
Appreciate
0
|
| 08-27-2012, 12:36 PM | #98 | |
|
2910
Rep 11,363
Posts |
Quote:
 Have a fun trip to Germany. Have a fun trip to Germany. [QUOTE=lippi;12570747]Jesal told me about your side grille idea! Can't wait to see it.
__________________
|
|
|
Appreciate
0
|
| 08-27-2012, 03:52 PM | #99 |
|
2910
Rep 11,363
Posts |
Set that just went out.
Side grilles with Singapore Grey surrounds + Light tinted LED's + Singapore grey front reflectors 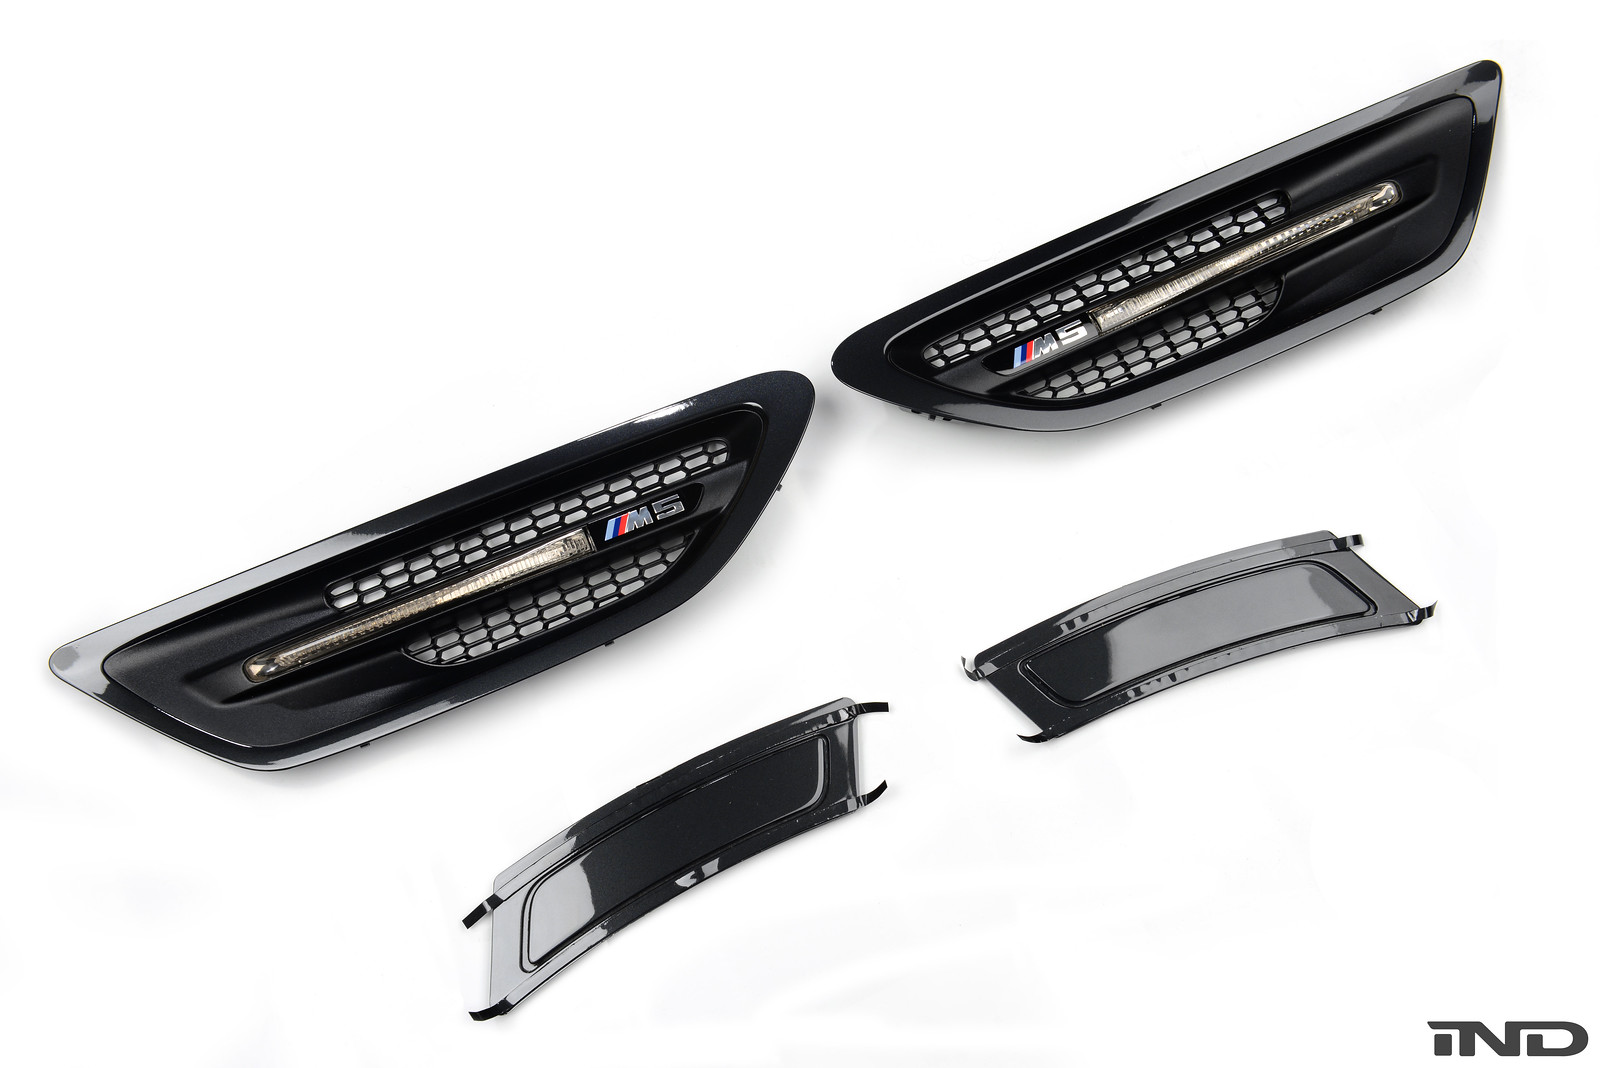 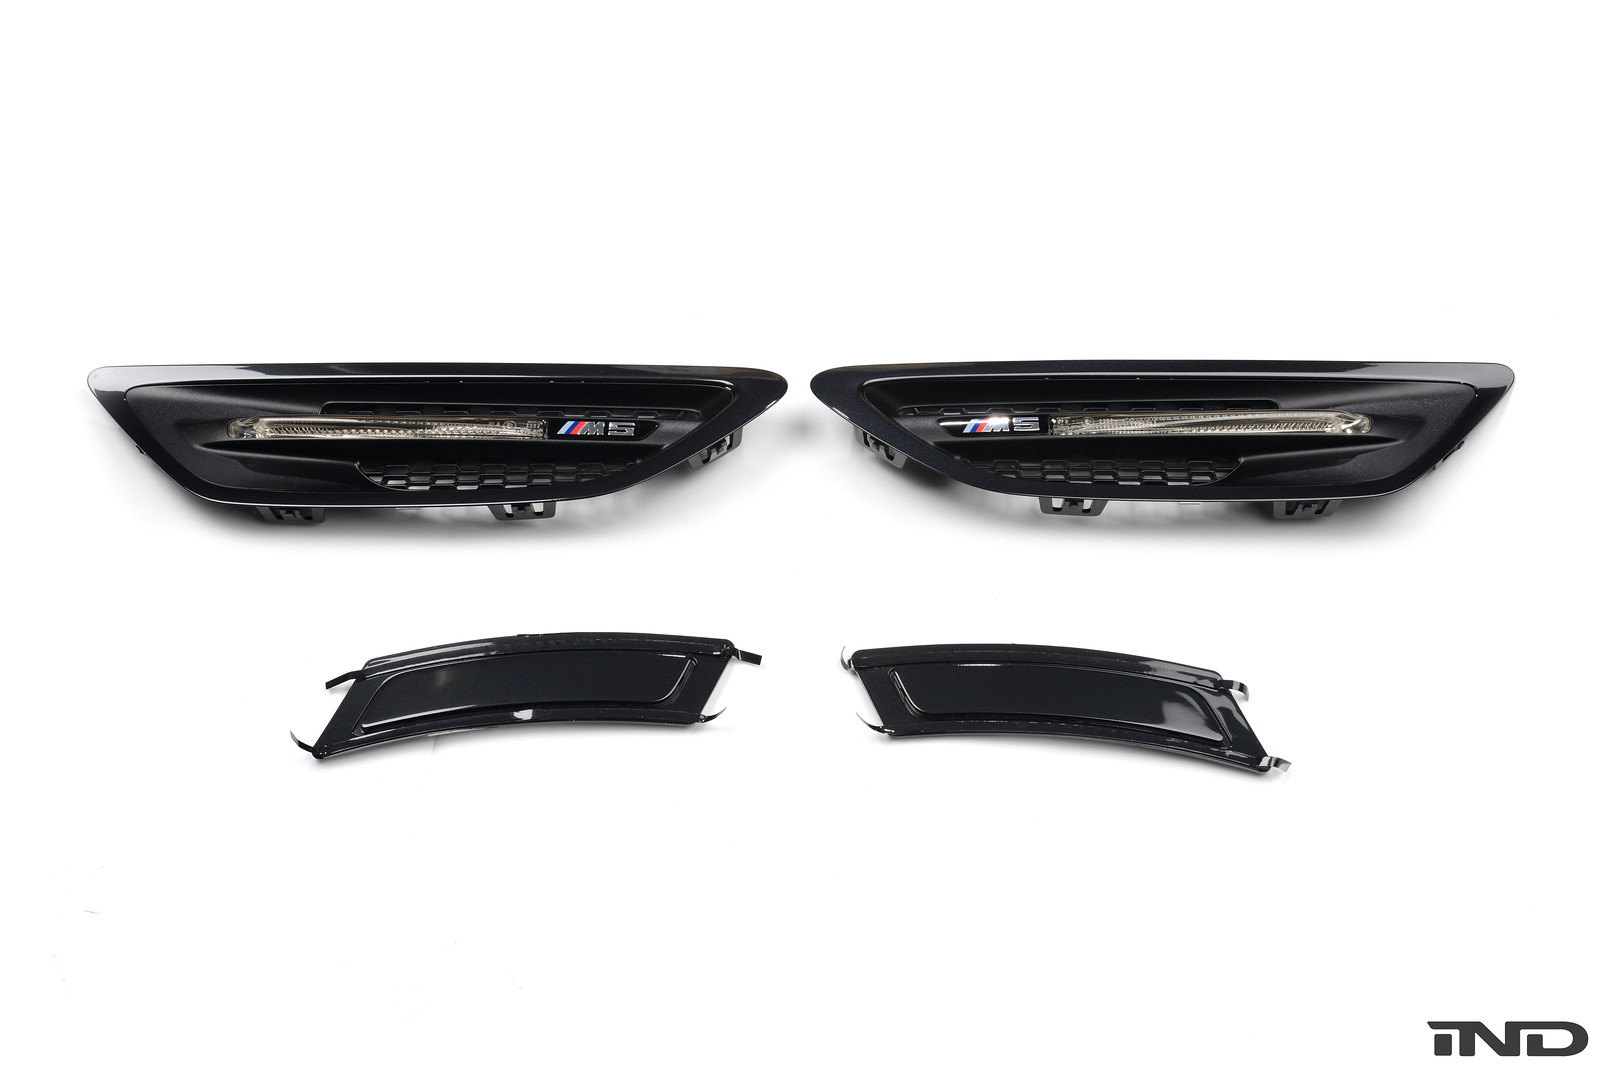
__________________
|
|
Appreciate
0
|
| 08-27-2012, 04:15 PM | #100 |
|
Yankee Air Pirate

168
Rep 982
Posts |
will you be able to frozen colors?
__________________
deposit placed for 2025 G99 ///M5 Touring || 2020 F90///M5 || 2014 F10 ///M5 || My Epic ED trip report|| || 2009 BMW R1200RT
 |
|
Appreciate
0
|
| 08-27-2012, 04:20 PM | #101 |
|
2910
Rep 11,363
Posts |
Sure we can do any Frozen colors in house

__________________
|
|
Appreciate
0
|
| 08-29-2012, 05:58 PM | #103 |
|
2910
Rep 11,363
Posts |
This one came out very nice. Black Sapphire surrounds + Black sapphire centers with clear LED's no tint.
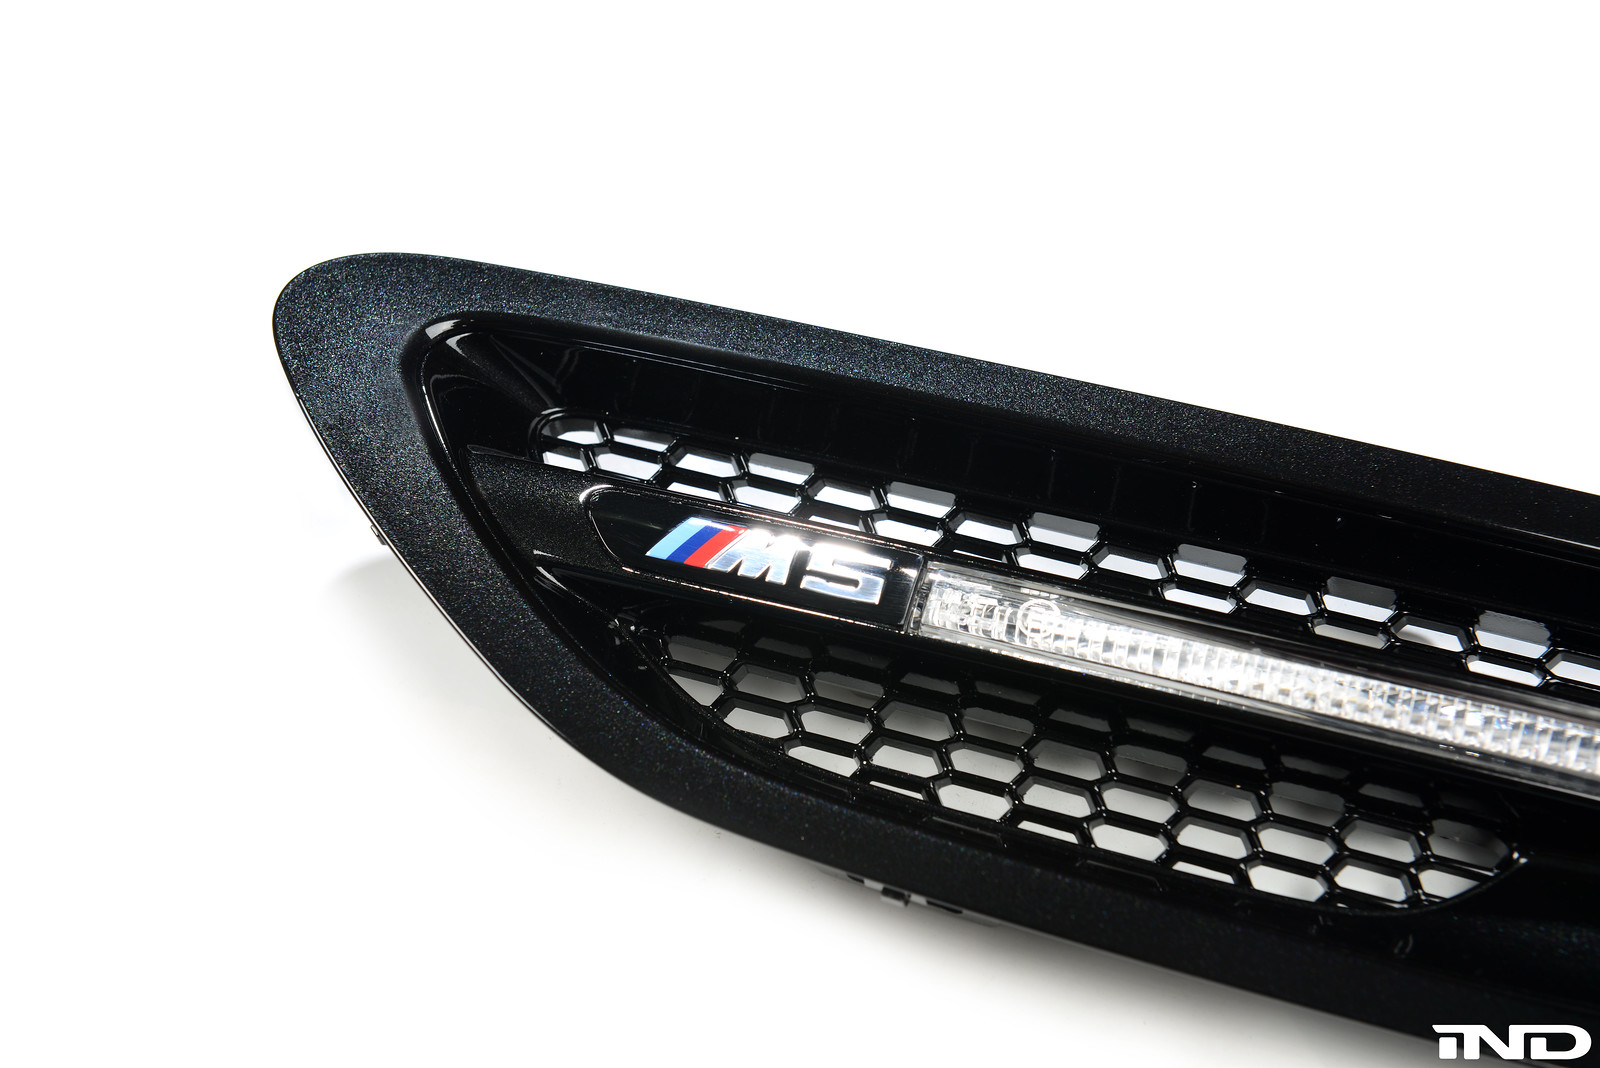 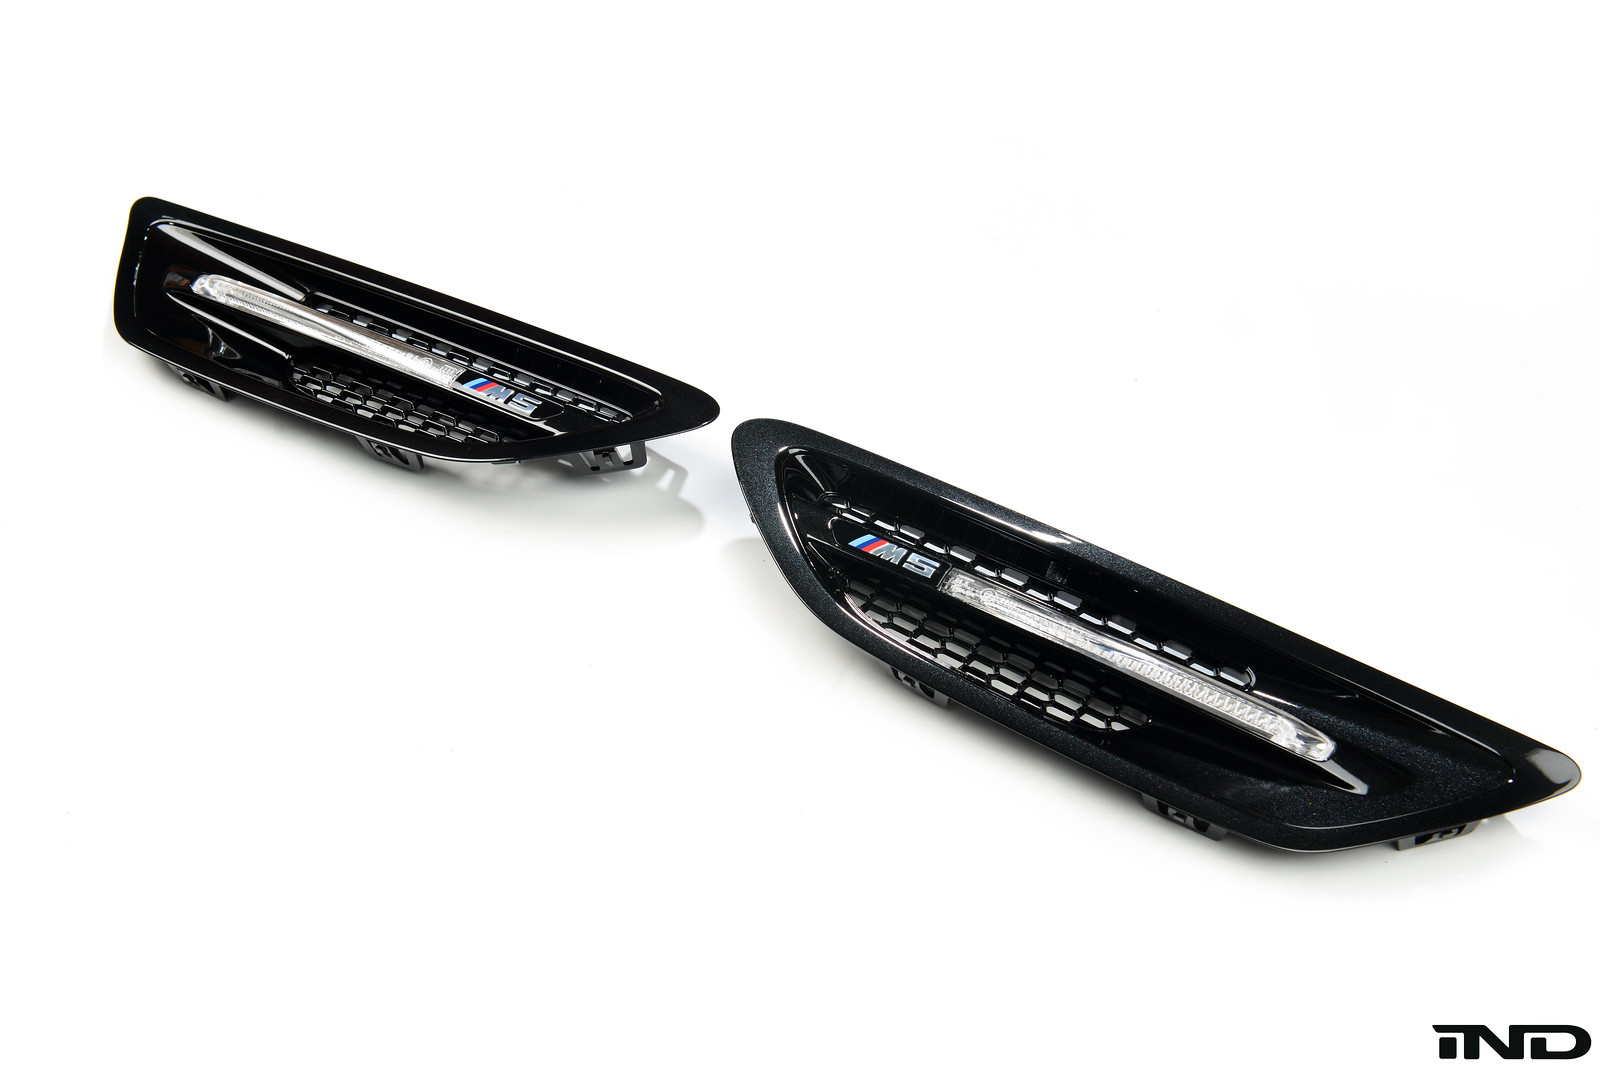
__________________
|
|
Appreciate
0
|
| 08-29-2012, 07:55 PM | #104 |
|
Lieutenant Colonel
 
75
Rep 1,802
Posts |
Going to need a set in SSII soon.
__________________
[SIGPIC][/SIGPIC]
2007 GT3 Clubsport w/CGT buckets in Scotland 2003 CSL, SG, Alcon BBK SOLD 2002 M5, SSII/Blk and bone stock. In storage back home in TX 2008 M3, AW/Blk 6MT, lots of track stuff SOLD |
|
Appreciate
0
|
| 08-30-2012, 09:44 AM | #105 |
|
2910
Rep 11,363
Posts |
You know how to get a hold of me

__________________
|
|
Appreciate
0
|
| 08-30-2012, 04:36 PM | #106 |
|
2910
Rep 11,363
Posts |
New cosmetic package on the way out.
F10 M5 sides with Imperial blue surrounds + Imperial blue front reflectors + Gloss black M5 emblem. 
__________________
|
|
Appreciate
0
|
| 08-30-2012, 08:12 PM | #107 |
|
Lieutenant Colonel
 
75
Rep 1,802
Posts |
Need to see some pics of how everyone is doing the gills/sides/surrounds/generalwhatnot
__________________
[SIGPIC][/SIGPIC]
2007 GT3 Clubsport w/CGT buckets in Scotland 2003 CSL, SG, Alcon BBK SOLD 2002 M5, SSII/Blk and bone stock. In storage back home in TX 2008 M3, AW/Blk 6MT, lots of track stuff SOLD |
|
Appreciate
0
|
| 08-31-2012, 07:14 PM | #108 |

1806
Rep 7,664
Posts |
IND Side Marker Installation Procedure
Similar to the E9X M3, BMW gave enthusiasts a head start with the elimination of the chrome window trim in favor of their gloss black "shadow line" trim. Unfortunately, BMW did not address the chrome side grills. With BMW leaving off at the window trim we decided to pick up the pieces and offer a high quality painted solution for the F10 M5 community. All IND side markers utilize the OEM part as a base to ensure a 100% fit. The original BMW chrome base does require a touch more preparation than if we had used an equivalent aftermarket part, but the end result is a product with perfect fitment. This side marker can be installed by anyone with a couple simple body tools and some time. Tools required:  1.) Step one is to ensure you provide yourself with the most comfortable installation environment. Our technicians are accustom to working with body tools around paint so in the installation photos you will notice no painters tape was used. With that being said we do recommend the DIY installer uses painters tape to frame the side marker. Framing the side marker with painters tape will protect your paint in the event that the hand gripping the nylon pry tool accidentally slips from the side marker. 2.) With the use of a flexible bondo spreader begin to separate the side marker from the fender. The F10 M5 side marker is held in by plastic tabs so the purpose of the bondo spreader is to create room for the nylon prybar to do its job.  3.) With the bondo spreader creating a view of the mounting tabs, please take note of these tabs. There are 3 tabs on the top portion of the side marker, 1 toward the front of the vehicle, and 3 more tabs on the underside. The best option is to work from the top down as a loose top will allow you to simply wiggle the bottom of the side marker free. 4.) with the bondo spreader in one hand and the nylon pry bar in the other, carefully pull the bondo spreader toward your body. This action will result in exposing the mounting tab. With the tab exposed press the nylon pry bar down on the tab with light pressure. The pressure from the pry bar will release the tab from the  5.) Repeat step 4 across the top portion of the side marker all the way to the side tab located in the direction of the front bumper.    6.) AUCHTUNG! Do not pull the side marker out of the vehicle without first removing the clip from LED power cable.   7.) Now that the side marker is free from the LED power cable you are now able to install the IND Painted Side Marker. The side marker will simply snap into place. First, reposition the LED power cable into the male connector on the LED. Similar to the removal place the top clips into the fender housing and carefully push into the fender.      8.) Ensure that both turn signal LED's function properly before driving. Viola! 
__________________
|
|
Appreciate
0
|
| 08-31-2012, 07:16 PM | #109 |

1806
Rep 7,664
Posts |
IND Trunk Badge Installation Procedure
In continuation of supplanting the BMW chrome accents, one of the other areas require attention is the trunk badge. BMW always supplies a chrome badge denoting the given vehicles model. Although we will not substitute the infamous Texaco Red and Bavaria Blue accents, we will provide enthusiasts with a badge suitable for the theme of their vehicle. Similar to our gloss black side marker we utilize the OEM piece as a base. Tools required:
2.) Simply take the bondo spreader and gently work your way through the 3M adhesive backing. The more patience demonstrated in this step will result in a easier clean up. 3.) When the chrome badge is removed from the vehicle there may be some adhesive left over from the backing. Simply remove this adhesive with a all purpose cleaner carefully applied it to a microfiber. 4.) Now that the surface is clean feel free to apply a little adhesive promoter. Alternatively, at this time you can simply apply the gloss black lettering. Remove the wax paper cover on the adhesive of the badge and apply one letter at a time with light pressure. 5.) Upon completion remove the painters tape, clean up the area around the badge, and admire how the removal of a little chrome piece can change the back of a vehicle     
__________________
|
|
Appreciate
0
|
| 08-31-2012, 09:17 PM | #110 |
|
BMW obsessed
9878
Rep 11,056
Posts |
IND Painted Reflector Installation Procedure
Painted reflectors are among the first additions made by any owner of a modern BMW. The unsightly orange reflectors installed in cars bound for North America instantly break the smooth lines of BMW bumpers, and the F10 M5 is no different. IND provides painted reflectors as a cost effective solution. We use OE BMW reflectors for a factory fit, and the same paint process we would use to repaint an entire car. Each reflector is sanded, prepped for paint, primed, then painted. Many enthusiasts enjoy installing their own painted reflectors, so weve created this installation DIY to help. Tools needed:
First, turn the steering wheel to full lock, in any direction. This will expose the fender liner.   With the fender liner exposed, begin removing the 8mm screws near the front reflectors.  Slide your hand behind the fender liner, to access the back of the painted reflector. Youll need to keep your hand on the back of the reflector to control its movement as you remove it from the bumper.   Push on the face of the reflector. This will eventually release the adhesive backing on the reflector from the inside of the bumper, and will free the reflector. Be careful not to drop the reflector inside the bumper during this step, as it may come free suddenly! At this point you can remove the OE amber reflector.  Remove any remaining adhesive tape by peeling it from the inside of the bumper.  Soak a rag in an alcohol-based cleaner, and clean the inside surface of the bumper. This will prepare the area for a strong bond with the new adhesive.  Take the new IND painted reflector, and remove the film covering the adhesive tape.  Slide the reflector into the bumper. Be careful not to touch the adhesive tape during this step.    Align the reflector with its opening, and press the reflector against the inside of the bumper. Hold the reflector for several seconds to ensure that the adhesive has a strong grip. Thats it! Now simply turn the wheel to full lock on the opposite side, and repeat the process.
__________________
|
|
Appreciate
0
|
Post Reply |
| Bookmarks |
|
|